Creating a New Project
Overview
Creating a new programming project can be challenging, but an IDE like IntelliJ can help streamline your workflows and help you start a new project quickly. One of the benefits of IntelliJ is the usage of a Guided User Interface (GUI) for many coding editor features. A GUI is a form of user interface that allows the user to perform actions by directly manipulating graphical elements. For example, rather than performing several actions to complete a task, a simple button press in IntelliJ can accomplish everything.
We will be using IntelliJ’s GUI to create a new programming project in two ways: creating a local project from scratch or cloning a project from an existing repository on Github. Cloning a project means copying a project stored on the GitHub cloud, and downloading it to your local machine.
Hopefully, IntelliJ can help you streamline your programming and help you start a coding project swiftly and smoothly!
Creating a New Local Project
The first method of starting a new programming project is creating one locally. This means creating a project from scratch without having the involvement of a version control system like GitHub. Creating a local project is an excellent way to start coding immediately on a smaller project. You don’t need to spend time setting up version control and can start coding immediately!
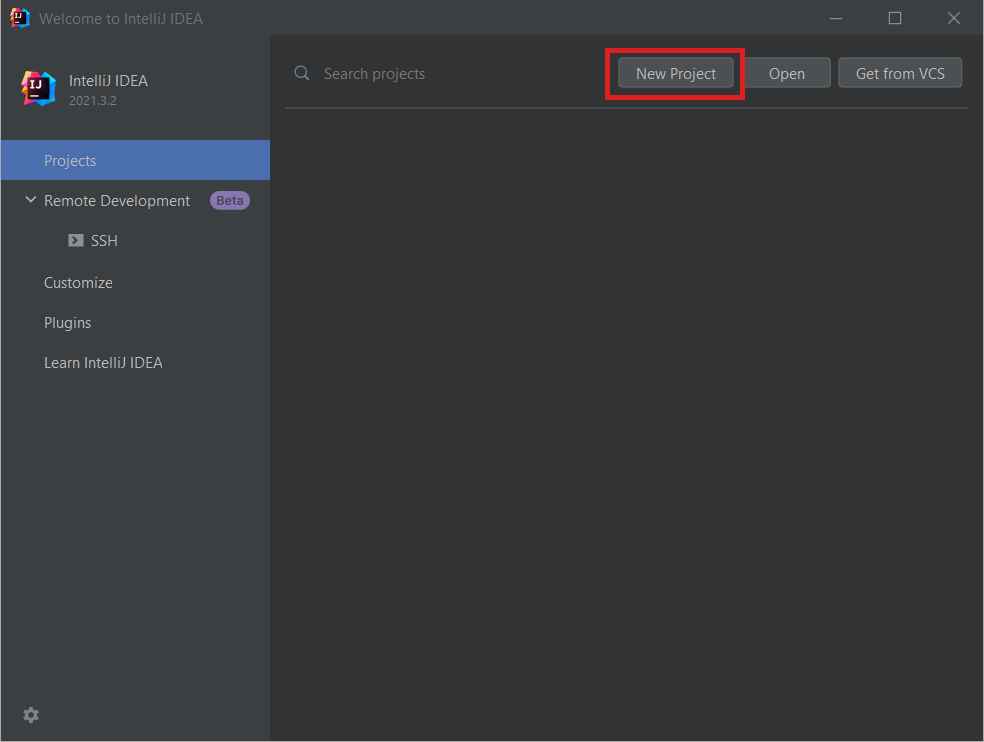
Press
⊞ Winand type IntelliJ into the search bar, click the IntelliJ icon to open the application. On Mac, presscmd+spaceand type in IntelliJ, press enter to open the application.Once IntelliJ is open, click the “New Project” button on the top right of the screen.
This will open up a new project interface that asks you for a Project SDK and additional libraries/frameworks. Click the dropdown menu to select a JDK version (this should already be installed from the preliminary requirements). In this case, we will select JDK 17. Click the “Next” button to confirm.
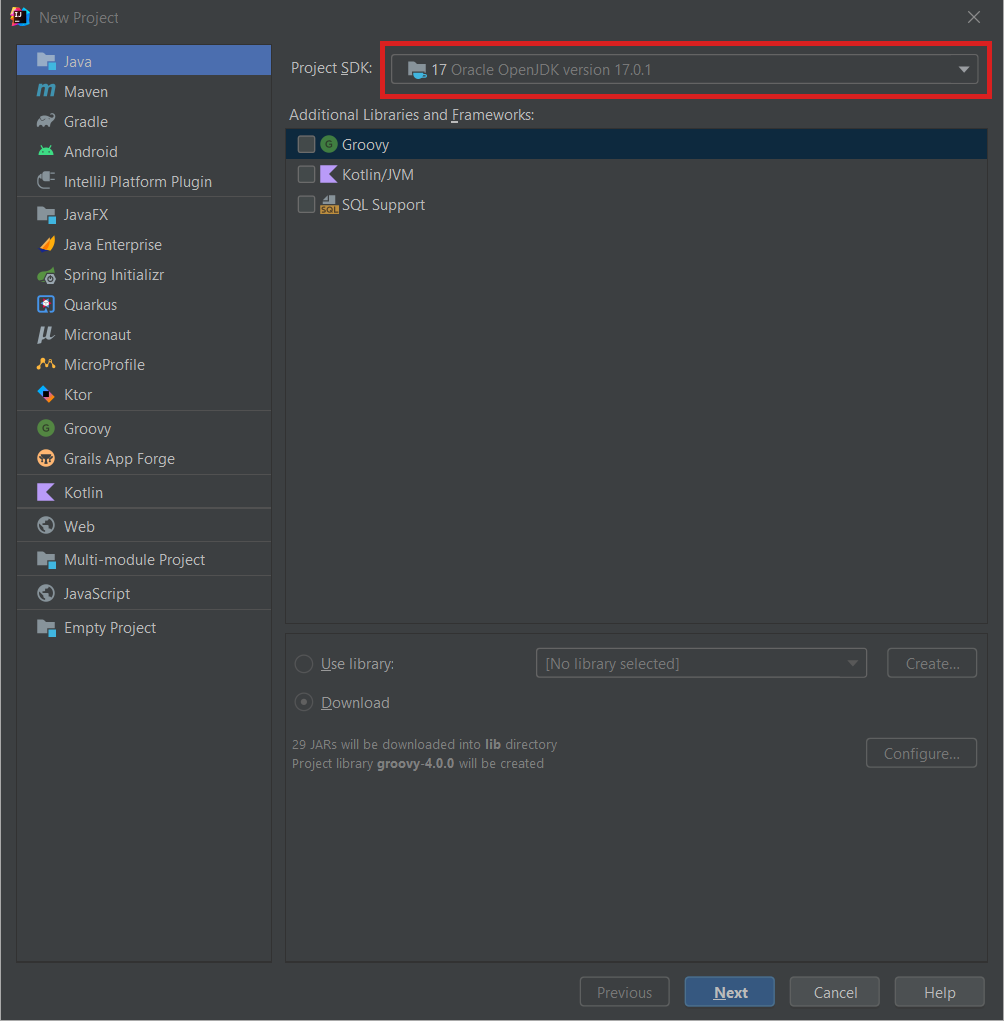
⚠️ ATTENTION: If you do not see a Project SDK to choose from, you may not have a JDK installed.IntelliJ will ask if you want to create a project from an existing template, we will skip this and press “Next”.
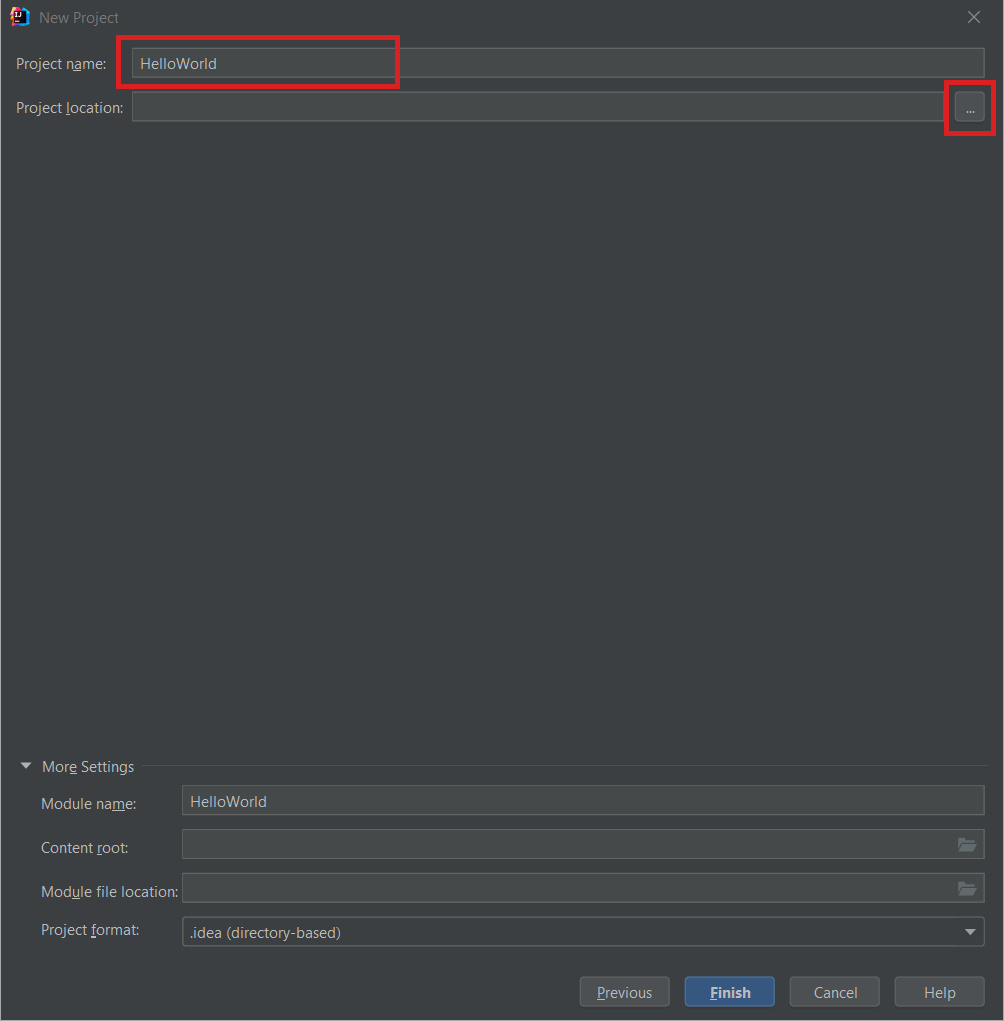
In this stage, IntelliJ will ask for a project name and location. Input a name into the “Project name” text field. You can accept the default directory location for your project, or select a specific directory by pressing the “…” adjacent to the “Project location” field. Accept all default values under “More settings” and press “Finish”.
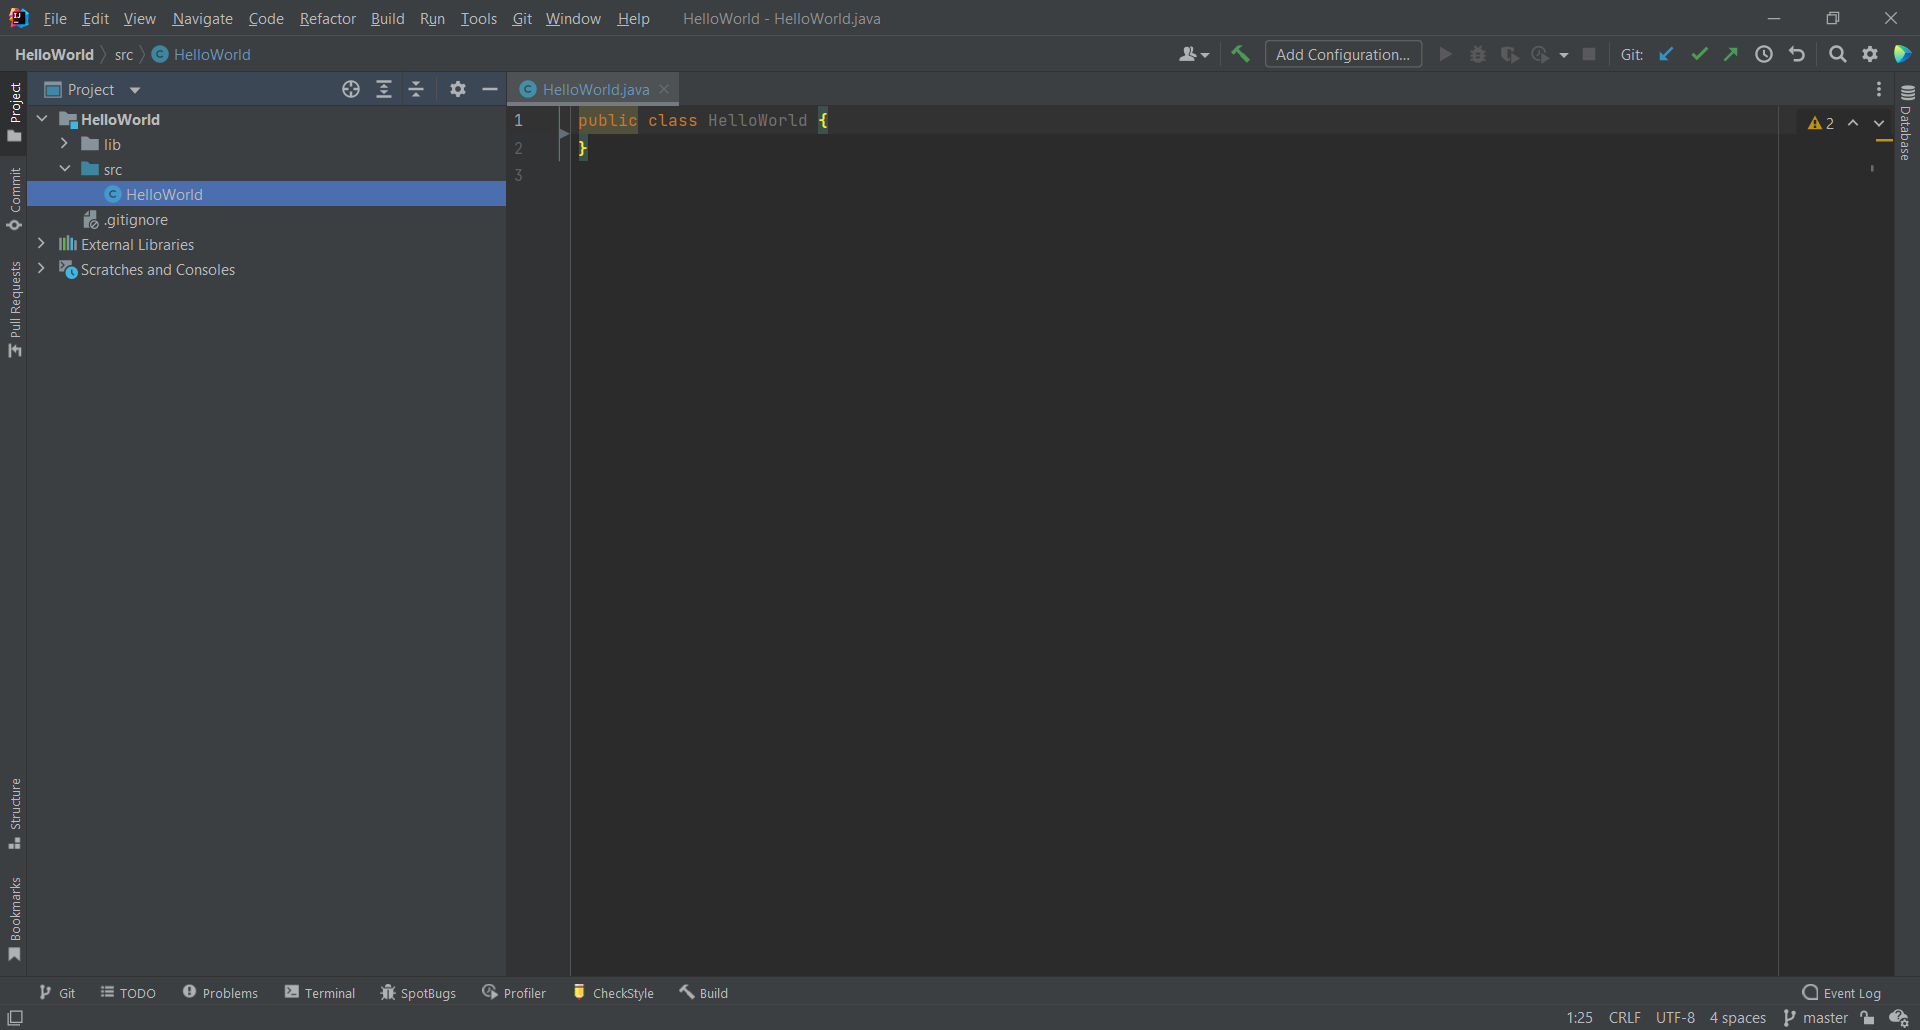
A new window containing your new project should pop up. Now we need to create your very first Class, which is the foundation of all programs in Java.
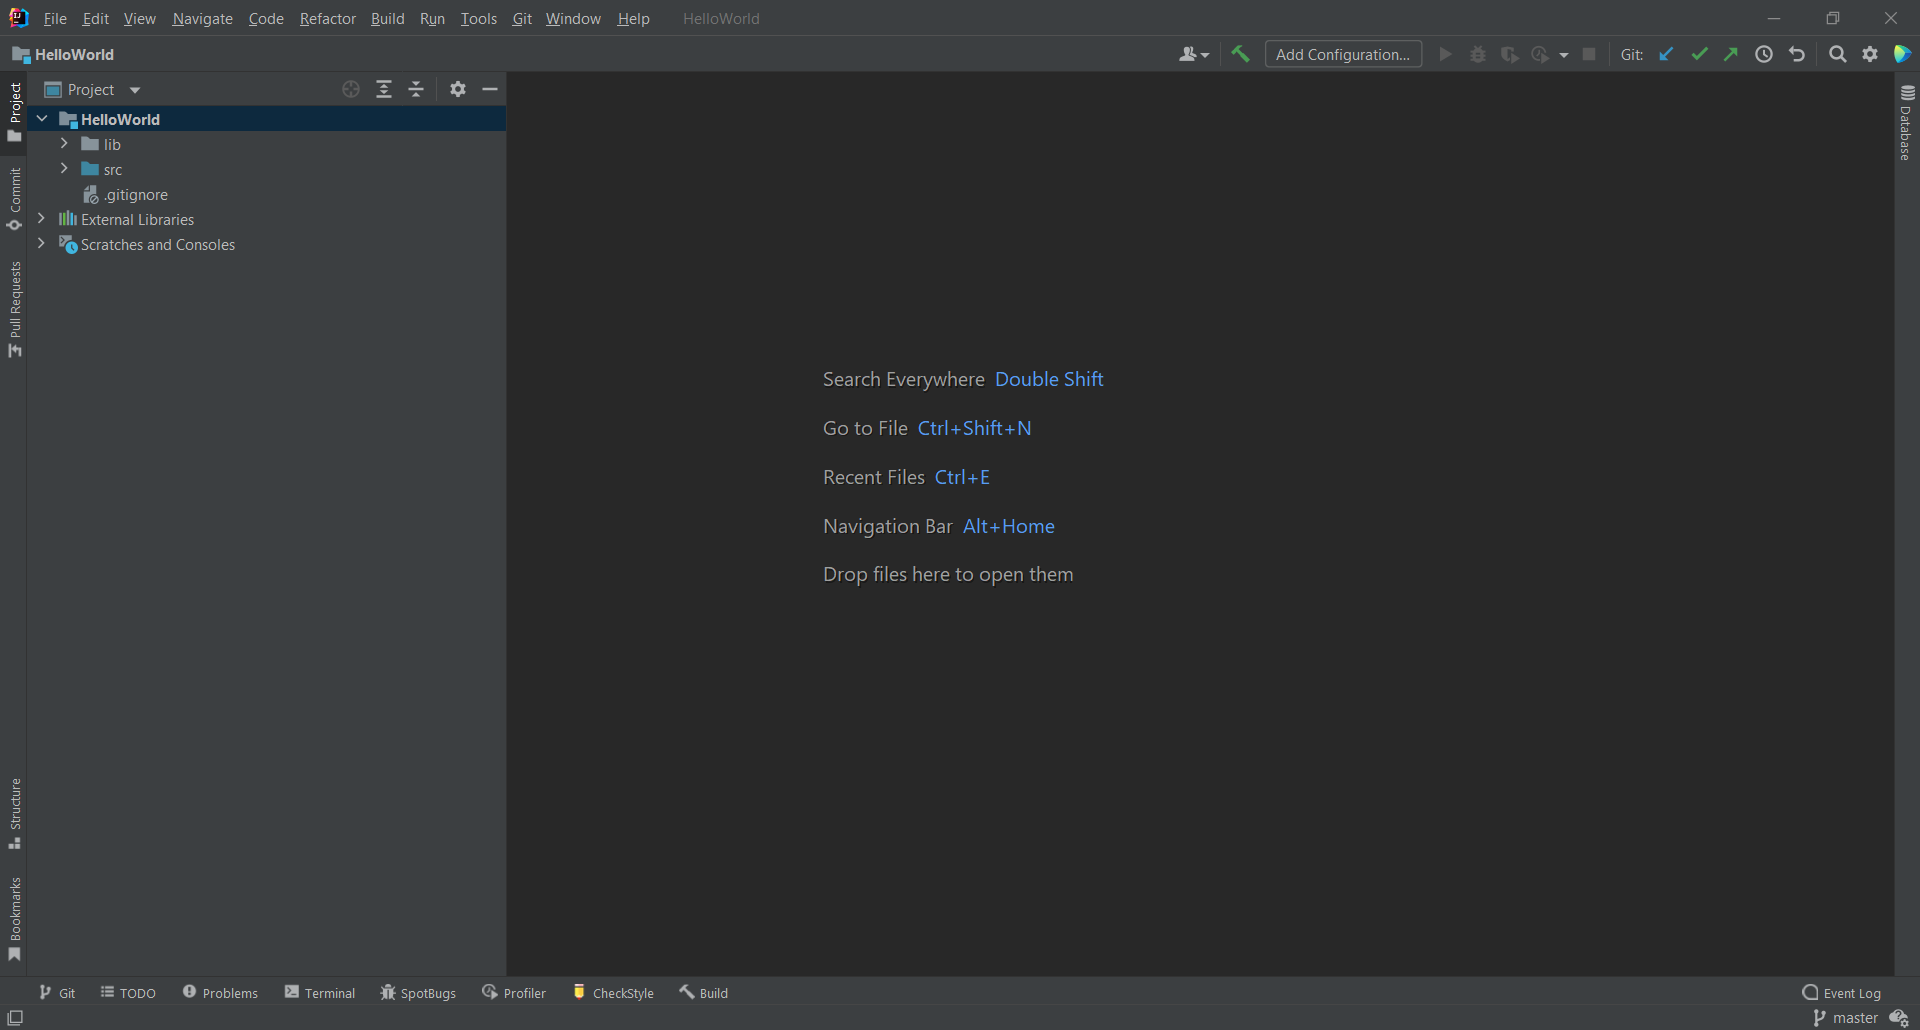
On the left-hand side of your screen, find the directory called “src”. This looks like a small blue folder. Right-click on it and hover over “New”, then select “Java Class”.

A small window will appear, prompting you to give a name to your Class. Let’s enter “HelloWorld” into this field and press
enter.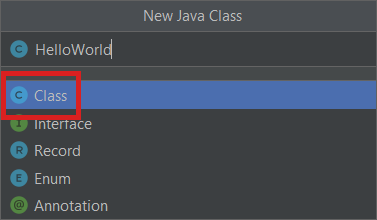
Congratulations! You just created your first Java program along with its first Class!
Cloning a New Project from GitHub
Although creating a new local project can be a quick way to start coding, “ cloning” a project can be a quick way to jump into an already existing project. When working on a larger project with several contributors, it is important to keep a collection of save files to maintain your work. Think of GitHub as a cloud storage system that stores the save files to your project. When we “clone” a project from GitHub, we are grabbing a project saved on the cloud and loading it on our local machine.
To start this process, there are a few things we need to prepare, namely connecting your GitHub account to IntelliJ. Please see the instructions on how to connect IntelliJ with GitHub before we begin.
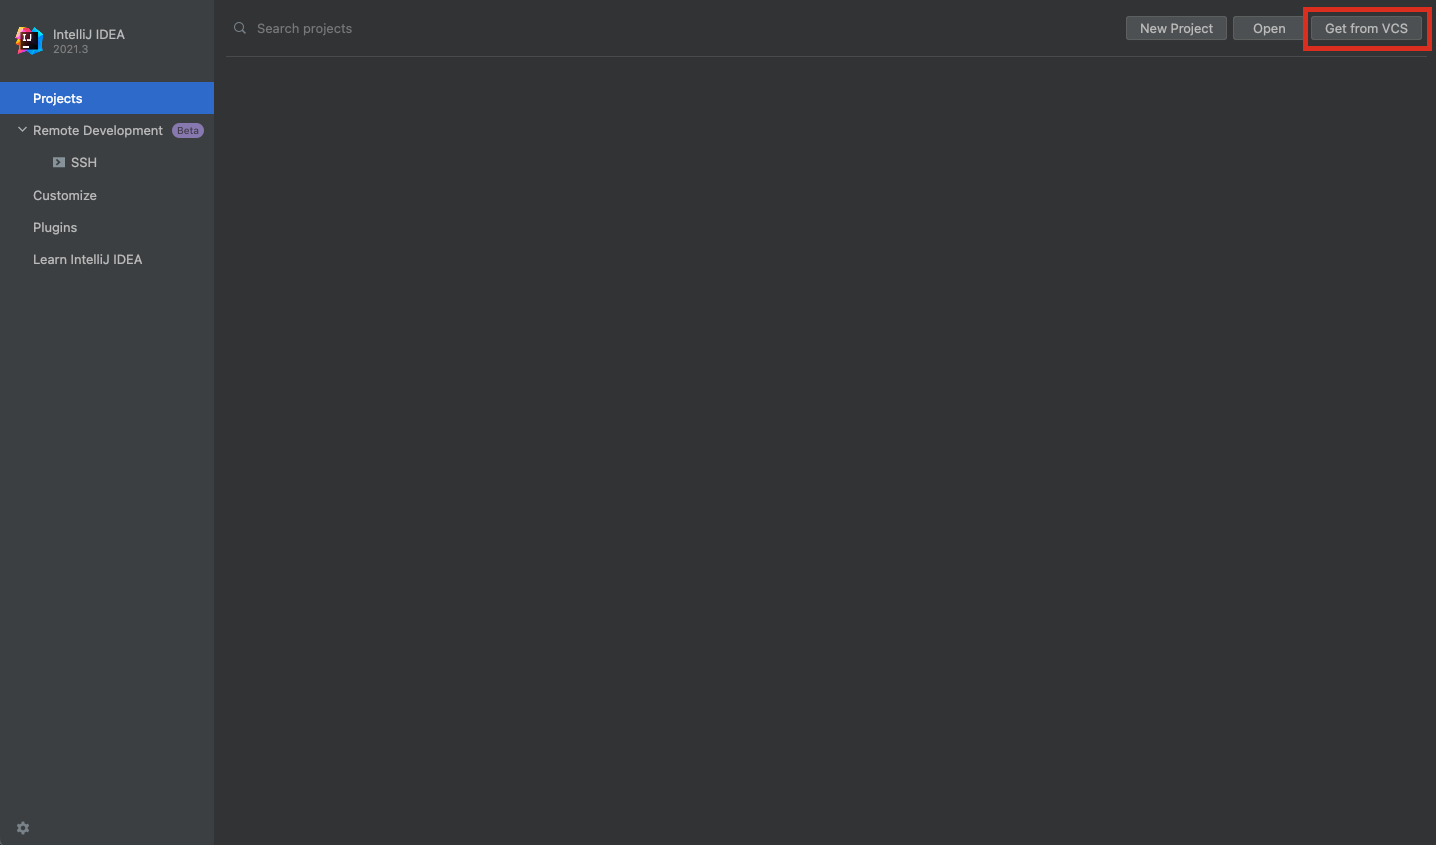
Press
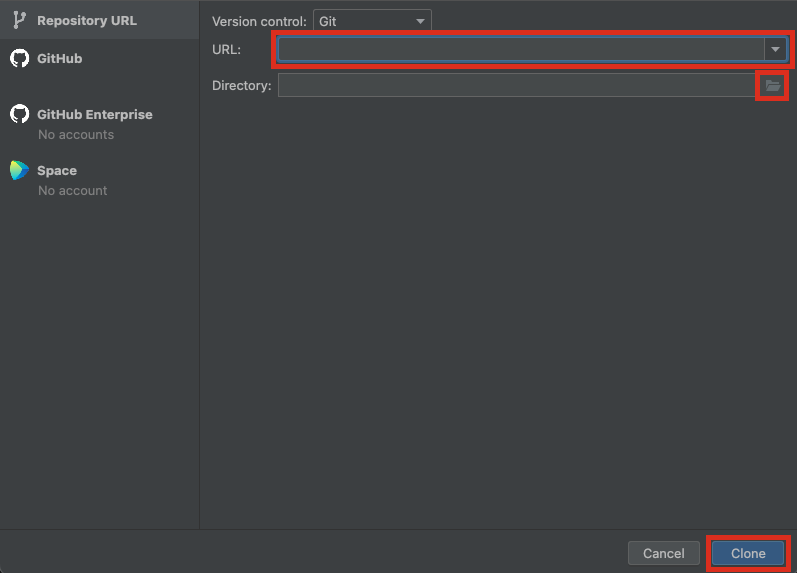
⊞ Winand type IntelliJ into the search bar, click the IntelliJ icon to open the application. On Mac, presscmd+spaceand type in IntelliJ, press enter to open the application. On the top right of the screen, select the “Get from VCS” button.A new window will pop up requesting Version control, URL, and directory.
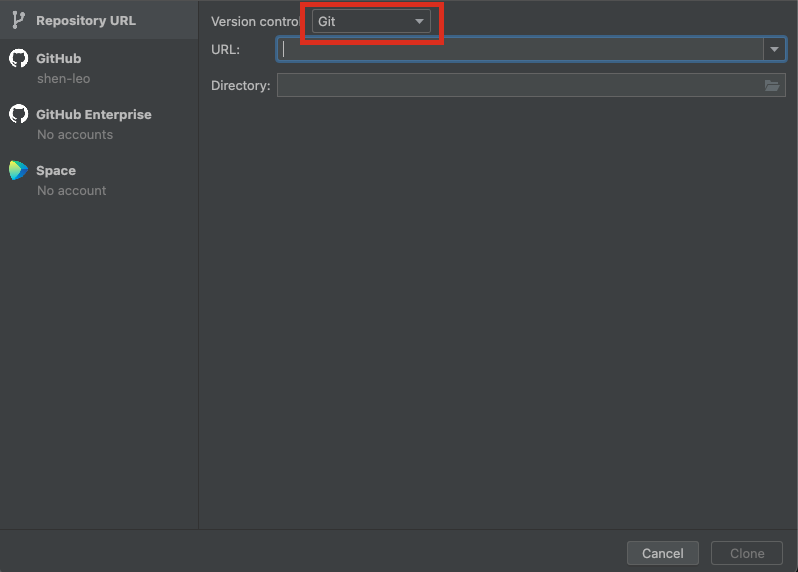
Select Git for the version control field.
Navigate to a GitHub project you would like to clone.
Click the green “Code” button and copy the HTTPS URL to your clipboard. This is a unique link that is connected to your specific GitHub repository.
⚠️ ATTENTION: Be sure to copy the URL under the HTTPS tab. SSH and GitHub CLI links will not work for this guide!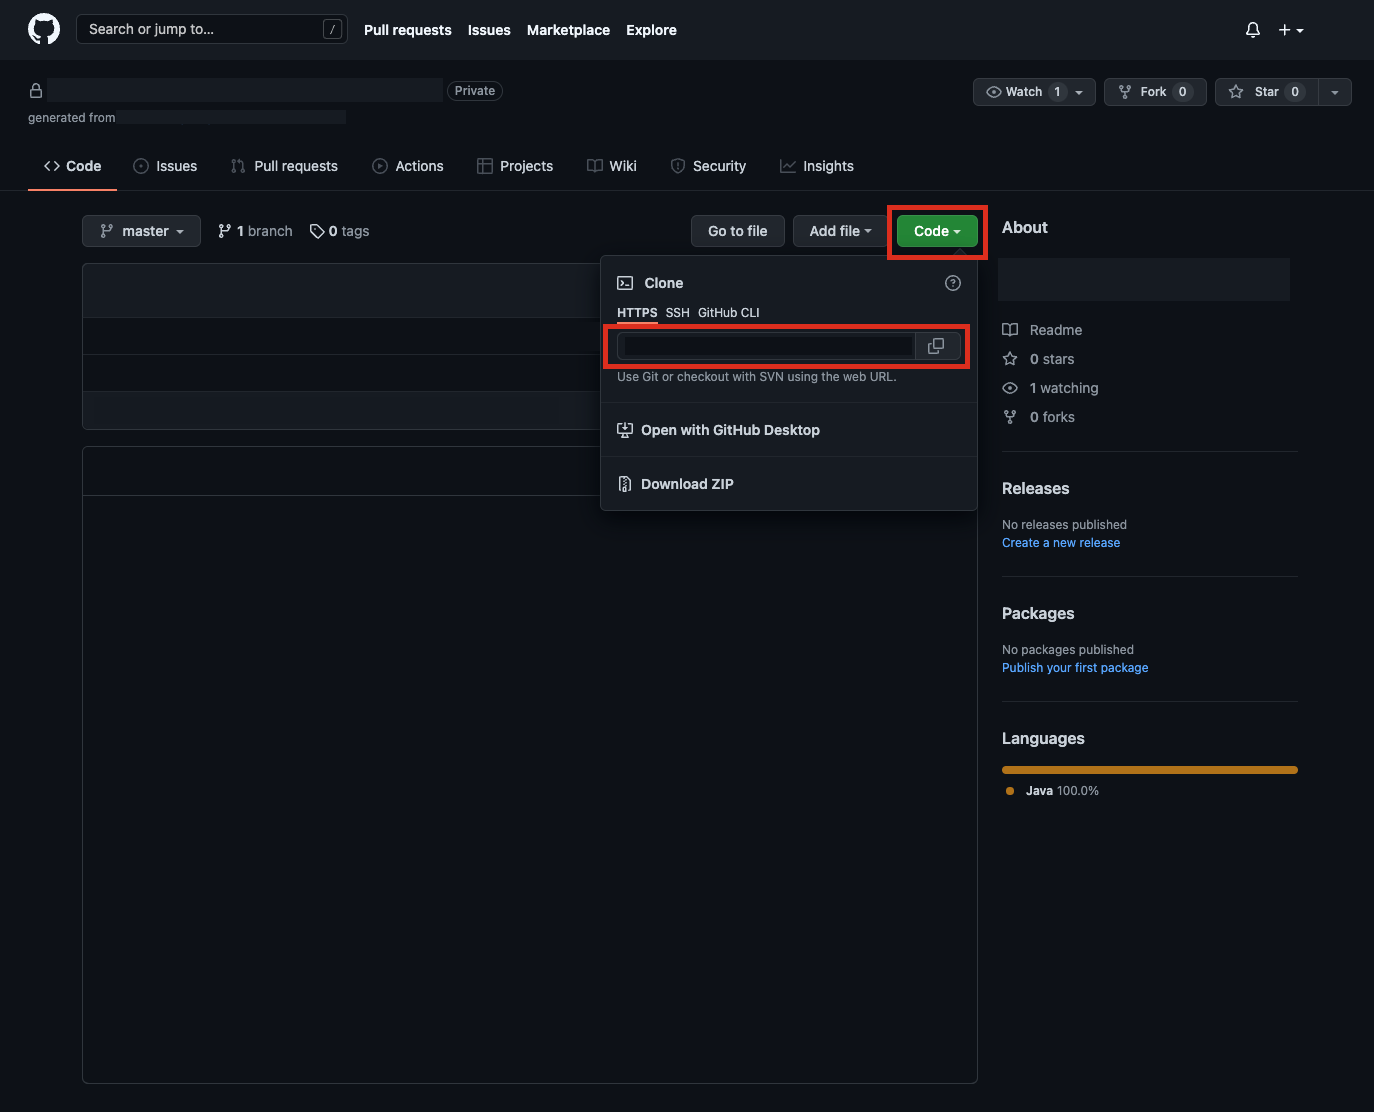
⚠️ WARNING: Be cautious when cloning a public project from GitHub! Make sure the project you are cloning is one you can trust.Paste this URL into the “URL” field in the IntelliJ window.
You can select a specific directory to save your project in by clicking the folder icon adjacent to the directory field, or you can simply accept the default location that is automatically generated.
Click the “Clone” button, and congratulations! You just successfully cloned your first project!

Conclusion
Now that you have learned to create a new local or cloned project, you will be able to start programming!
For the next steps, try looking for a public project on GitHub and clone it! Cloning existing projects is a great way to learn new technologies and reverse engineer how other programmers have created their applications.